The CX40 is one of ReStory's best verified device models: official developer notes explicitly describe its four screws and the major internal parts shared by the real and in-game versions. Official ReStory developer notes compare the in-game joystick with a real CX40 and state that both versions use the same major layout. The game keeps the repair approachable while preserving the shell, board, stick, red button, and cable relationship.
Device Quick Data
- Parts
- Shell, board, stick, button and cable
Recorded
Recorded in the linked source.Build not recordedPlayer repair records - Screws
- 4 outer screws
Recorded
Recorded in the linked source.Build not recordedPlayer repair records - License
- Check current job
Unknown
No reliable value is available yet.No stable license observation - Observed sale value
- —
Unknown
No reliable value is available yet.No publishable evidenceAwaiting a reproducible observation. - Competition
- —
Unknown
No reliable value is available yet.No publishable evidenceAwaiting a reproducible observation. - Difficulty
- Beginner-friendly
Recorded
Recorded in the linked source.Build not recordedPlayer repair records - Current build
- 1.0.015
Confirmed
Supported by official information, a developer reply or first-party testing.Build 1.0.015Verified: Steam build and official announcementsSite build reference; not a test of every field. - Common issue
- Cable alignment during closure
Recorded
Recorded in the linked source.Build not recordedPlayer repair records
Disassembly Layers
Layer overview; follow the current in-game placement guide.
- 01
Bottom casing
4 outer screws - 02
Motherboard and contacts
- 03
Joystick and red button
- 04
Cable channel
- 05
Top casing
⚠ Do not pinch or twist the cable
Atari CX40 device dossier
Official ReStory developer notes compare the in-game joystick with a real CX40 and state that both versions use the same major layout. The game keeps the repair approachable while preserving the shell, board, stick, red button, and cable relationship.
| Field | Verified guidance |
|---|---|
| Device family | Licensed joystick / controller |
| Screw count | 4 outer screws |
| Main parts | Top and bottom casing, motherboard, joystick, red button, power/control cable |
| Difficulty | Beginner-friendly |
| Special note | The board-to-cable connection is simplified in game |
Four-screw teardown
Turn the CX40 over and remove the four recessed case screws. Keep the cable relaxed as the shell separates. Lift the top without scattering the joystick or button pieces, then expose the board and contact areas. Clean the shell, board, stick interfaces, and red-button area indicated by the job. Replace only parts that the current device marks as broken.
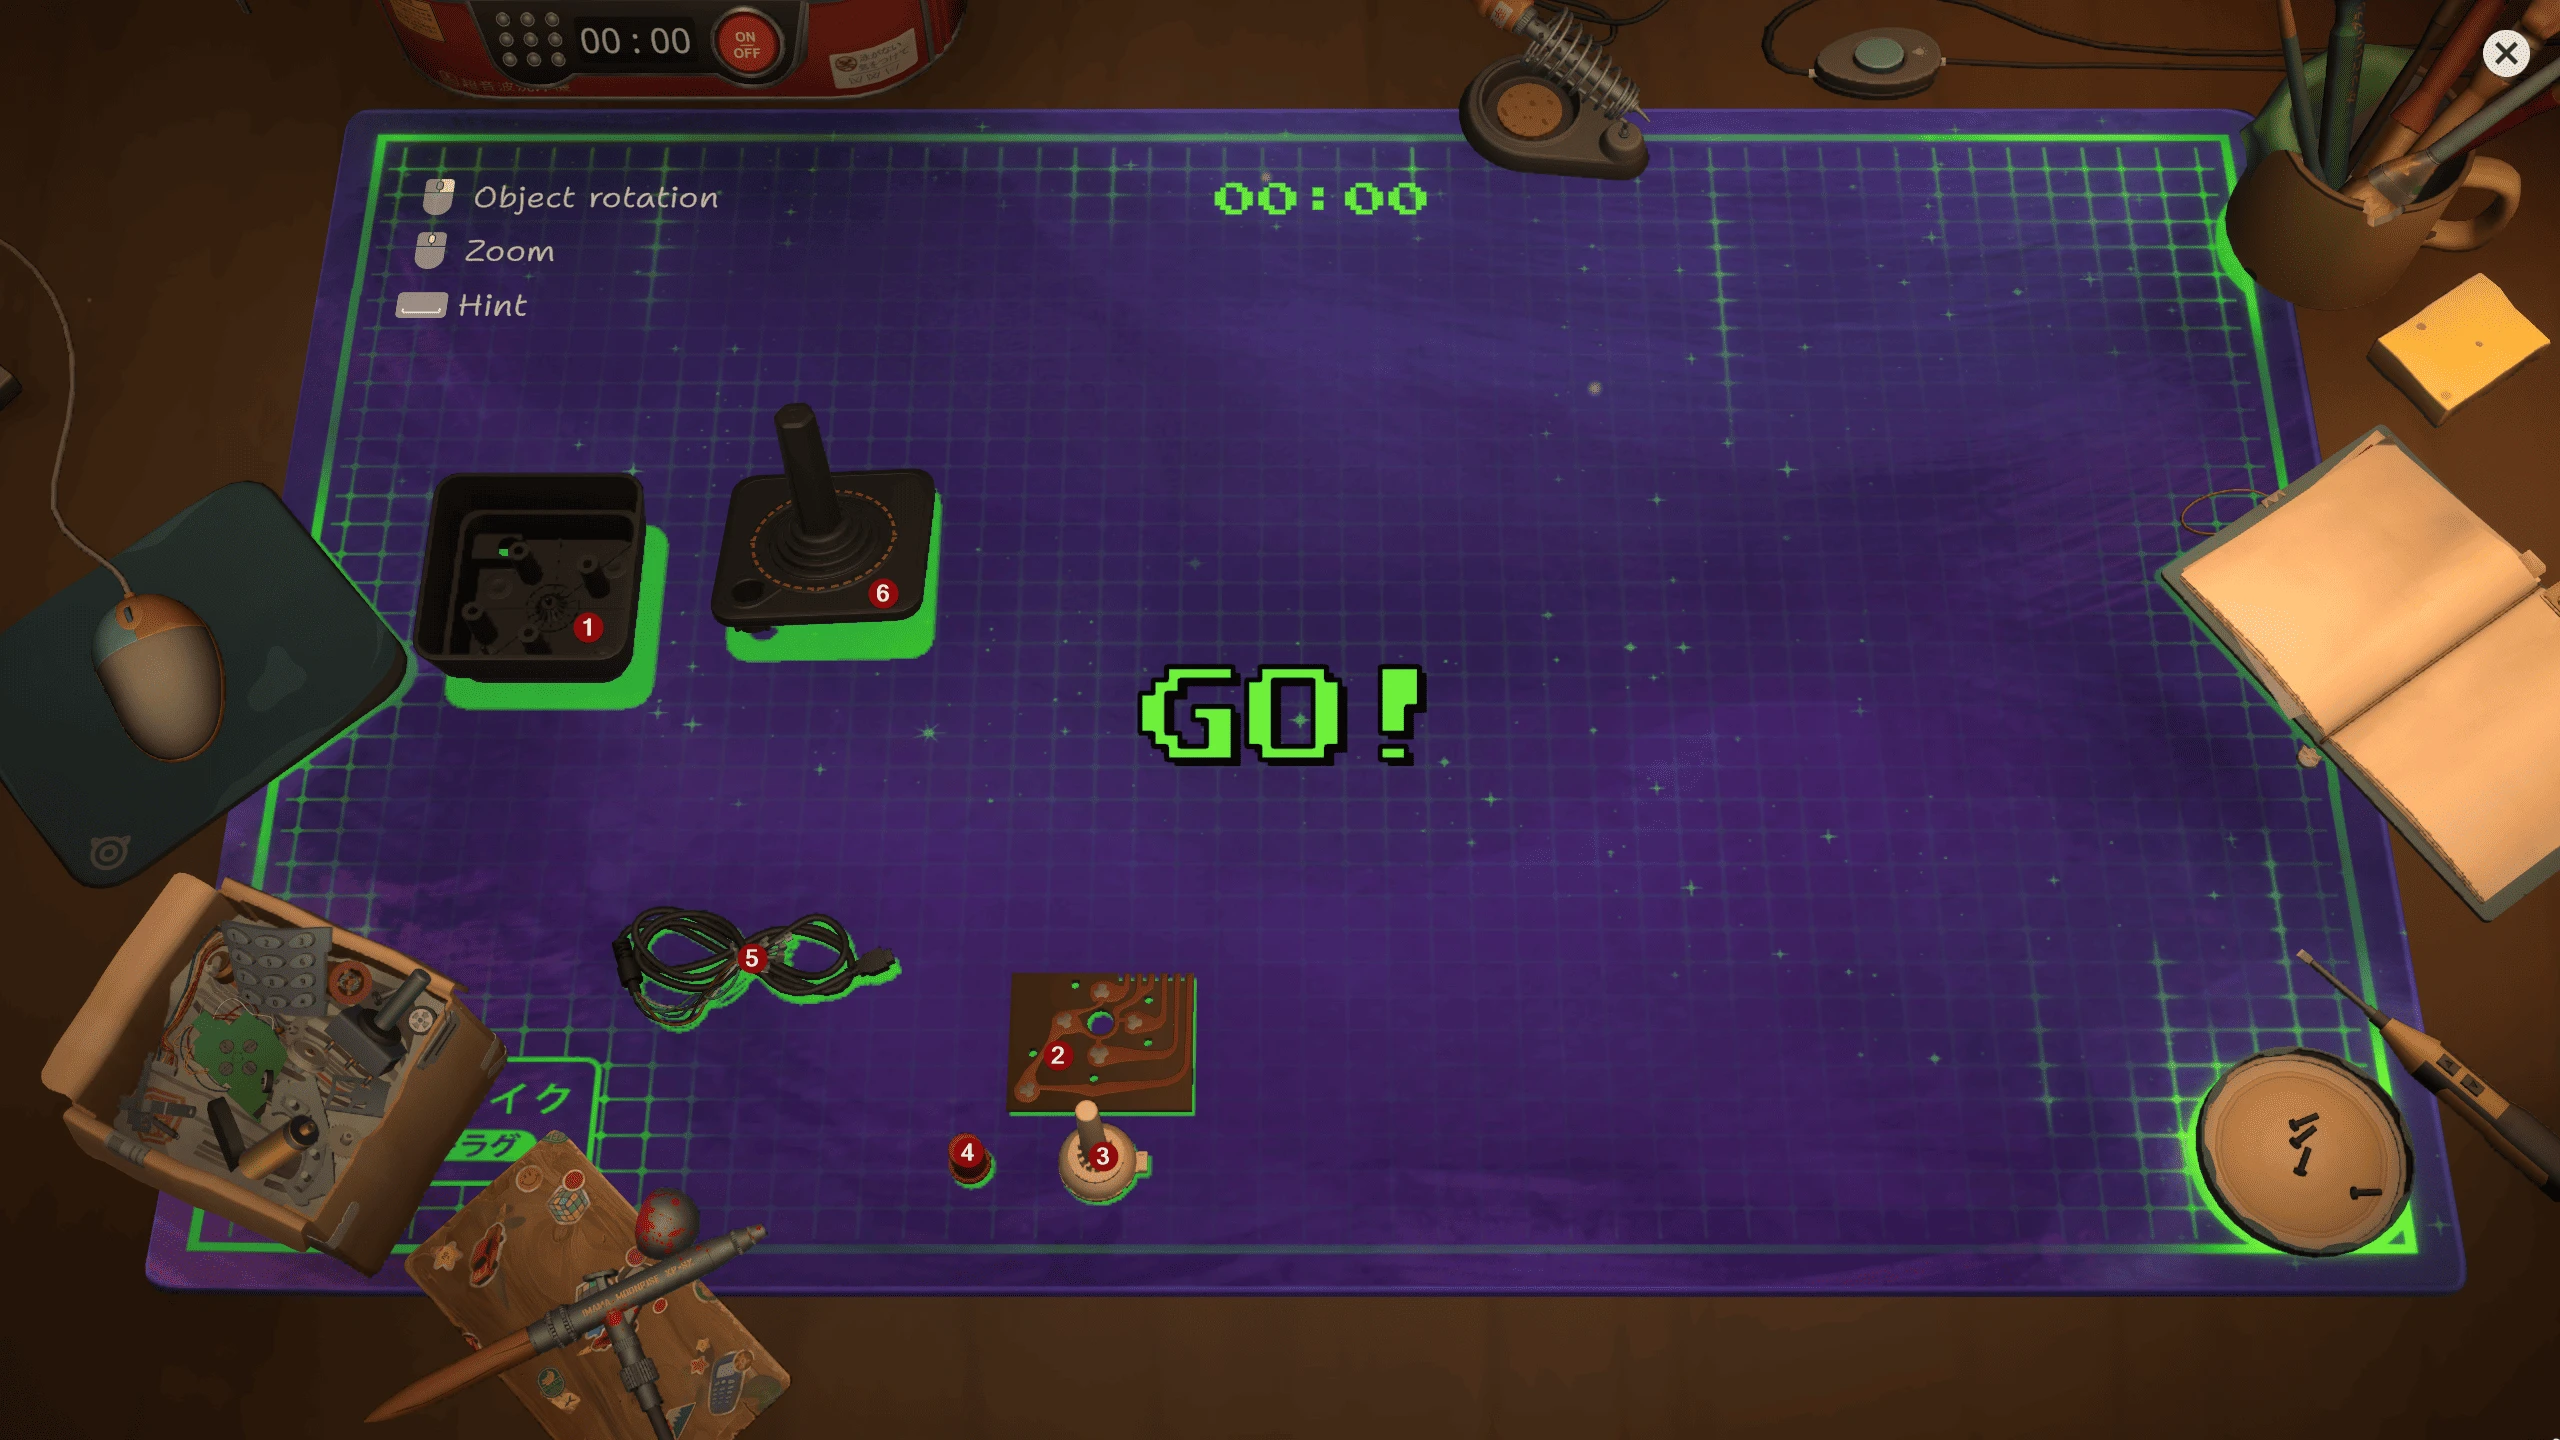
CX40 casing, board, joystick, button and cable before assembly. Competition layout; red numbers are the source author’s annotations.
Cable and control reassembly
Seat the board, joystick, red button, and cable in their intended channels before closing the case. A trapped or twisted cable can prevent the halves from seating cleanly. Lower the top shell without forcing it, confirm the button and stick remain aligned, then reinstall the four screws evenly rather than fully tightening one corner first.
When a second joystick becomes a donor
Early story play can leave you with a second CX40. Keep it intact until the customer device has been diagnosed, then compare its case, board, stick, button, and cable with the required repair. A donor is most valuable when it provides the exact damaged component and leaves other reusable pieces organized for later work.
CX40 completion checklist
This short device rewards a consistent layer order.
- Remove all four outer screws
- Open the shell without pulling the cable
- Keep joystick and red-button pieces in orientation
- Clean every marked face before replacing parts
- Seat the cable inside its channel
- Close the case evenly and verify the repair
Research links
These are the primary pages used to check the facts and current release context in this guide.
Official information, observable release behavior, and community reports are deliberately separated. A community report is not presented as a universal fix until it can be reproduced or supported by current patch notes.