ReStory's Atari 2600 is officially licensed and closely follows the recognizable console, while simplifying selected connections for play. Diagnose the actual copy before buying a donor. The Atari 2600 is an officially licensed console in ReStory and can appear in email repair work and marketplace listings. Official developer material says the team aimed for accuracy while simplifying trickier connections. Do not combine its record with the separate CX40 joystick dossier.
Device Quick Data
- Parts
- Multiple shell, shield, slot, switch and board layers
Recorded
Recorded in the linked source.Build not recordedPlayer repair records - Screws
- —
Unknown
No reliable value is available yet.No publishable evidenceAwaiting a reproducible observation. - License
- Check current job
Unknown
No reliable value is available yet.No stable license observation - Observed sale value
- —
Unknown
No reliable value is available yet.No publishable evidenceAwaiting a reproducible observation. - Competition
- —
Unknown
No reliable value is available yet.No publishable evidenceAwaiting a reproducible observation. - Difficulty
- Intermediate
Recorded
Recorded in the linked source.Build not recordedPlayer repair records - Current build
- 1.0.015
Confirmed
Supported by official information, a developer reply or first-party testing.Build 1.0.015Verified: Steam build and official announcementsSite build reference; not a test of every field. - Common issue
- Donor may share the same broken cover or switch
Recorded
Recorded in the linked source.Build not recordedPlayer repair records
Disassembly Layers
Layer overview; follow the current in-game placement guide.
- 01
Outer case
- 02
Cable and internal fasteners
- 03
RF shield
- 04
Cartridge slot and switch assembly
- 05
Main board
⚠ Follow ReStory interactions, not a real-console service manual
Atari 2600 device dossier
The Atari 2600 is an officially licensed console in ReStory and can appear in email repair work and marketplace listings. Official developer material says the team aimed for accuracy while simplifying trickier connections. Do not combine its record with the separate CX40 joystick dossier.
| Field | Verified guidance |
|---|---|
| Device family | Licensed home console |
| Order source | Email jobs and marketplace |
| Difficulty | Medium; several shell, cable, shield, slot, and switch layers |
| Common visible faults | Cracked top cover, damaged switch, cable, dirt on shielding or cartridge slot |
| Parts strategy | Direct part listing or same-model donor |
Teardown sequence that stays readable
Place the console with the underside visible and remove the outer case fasteners before lifting the bottom layer. Disconnect or move the cable only when the current layer allows it. Continue to the small internal fasteners, RF shield, cartridge slot, switch assembly, and board. Clean each newly exposed face before moving deeper. Reassembly is the same sequence in reverse, so keep each layer and its fasteners grouped.
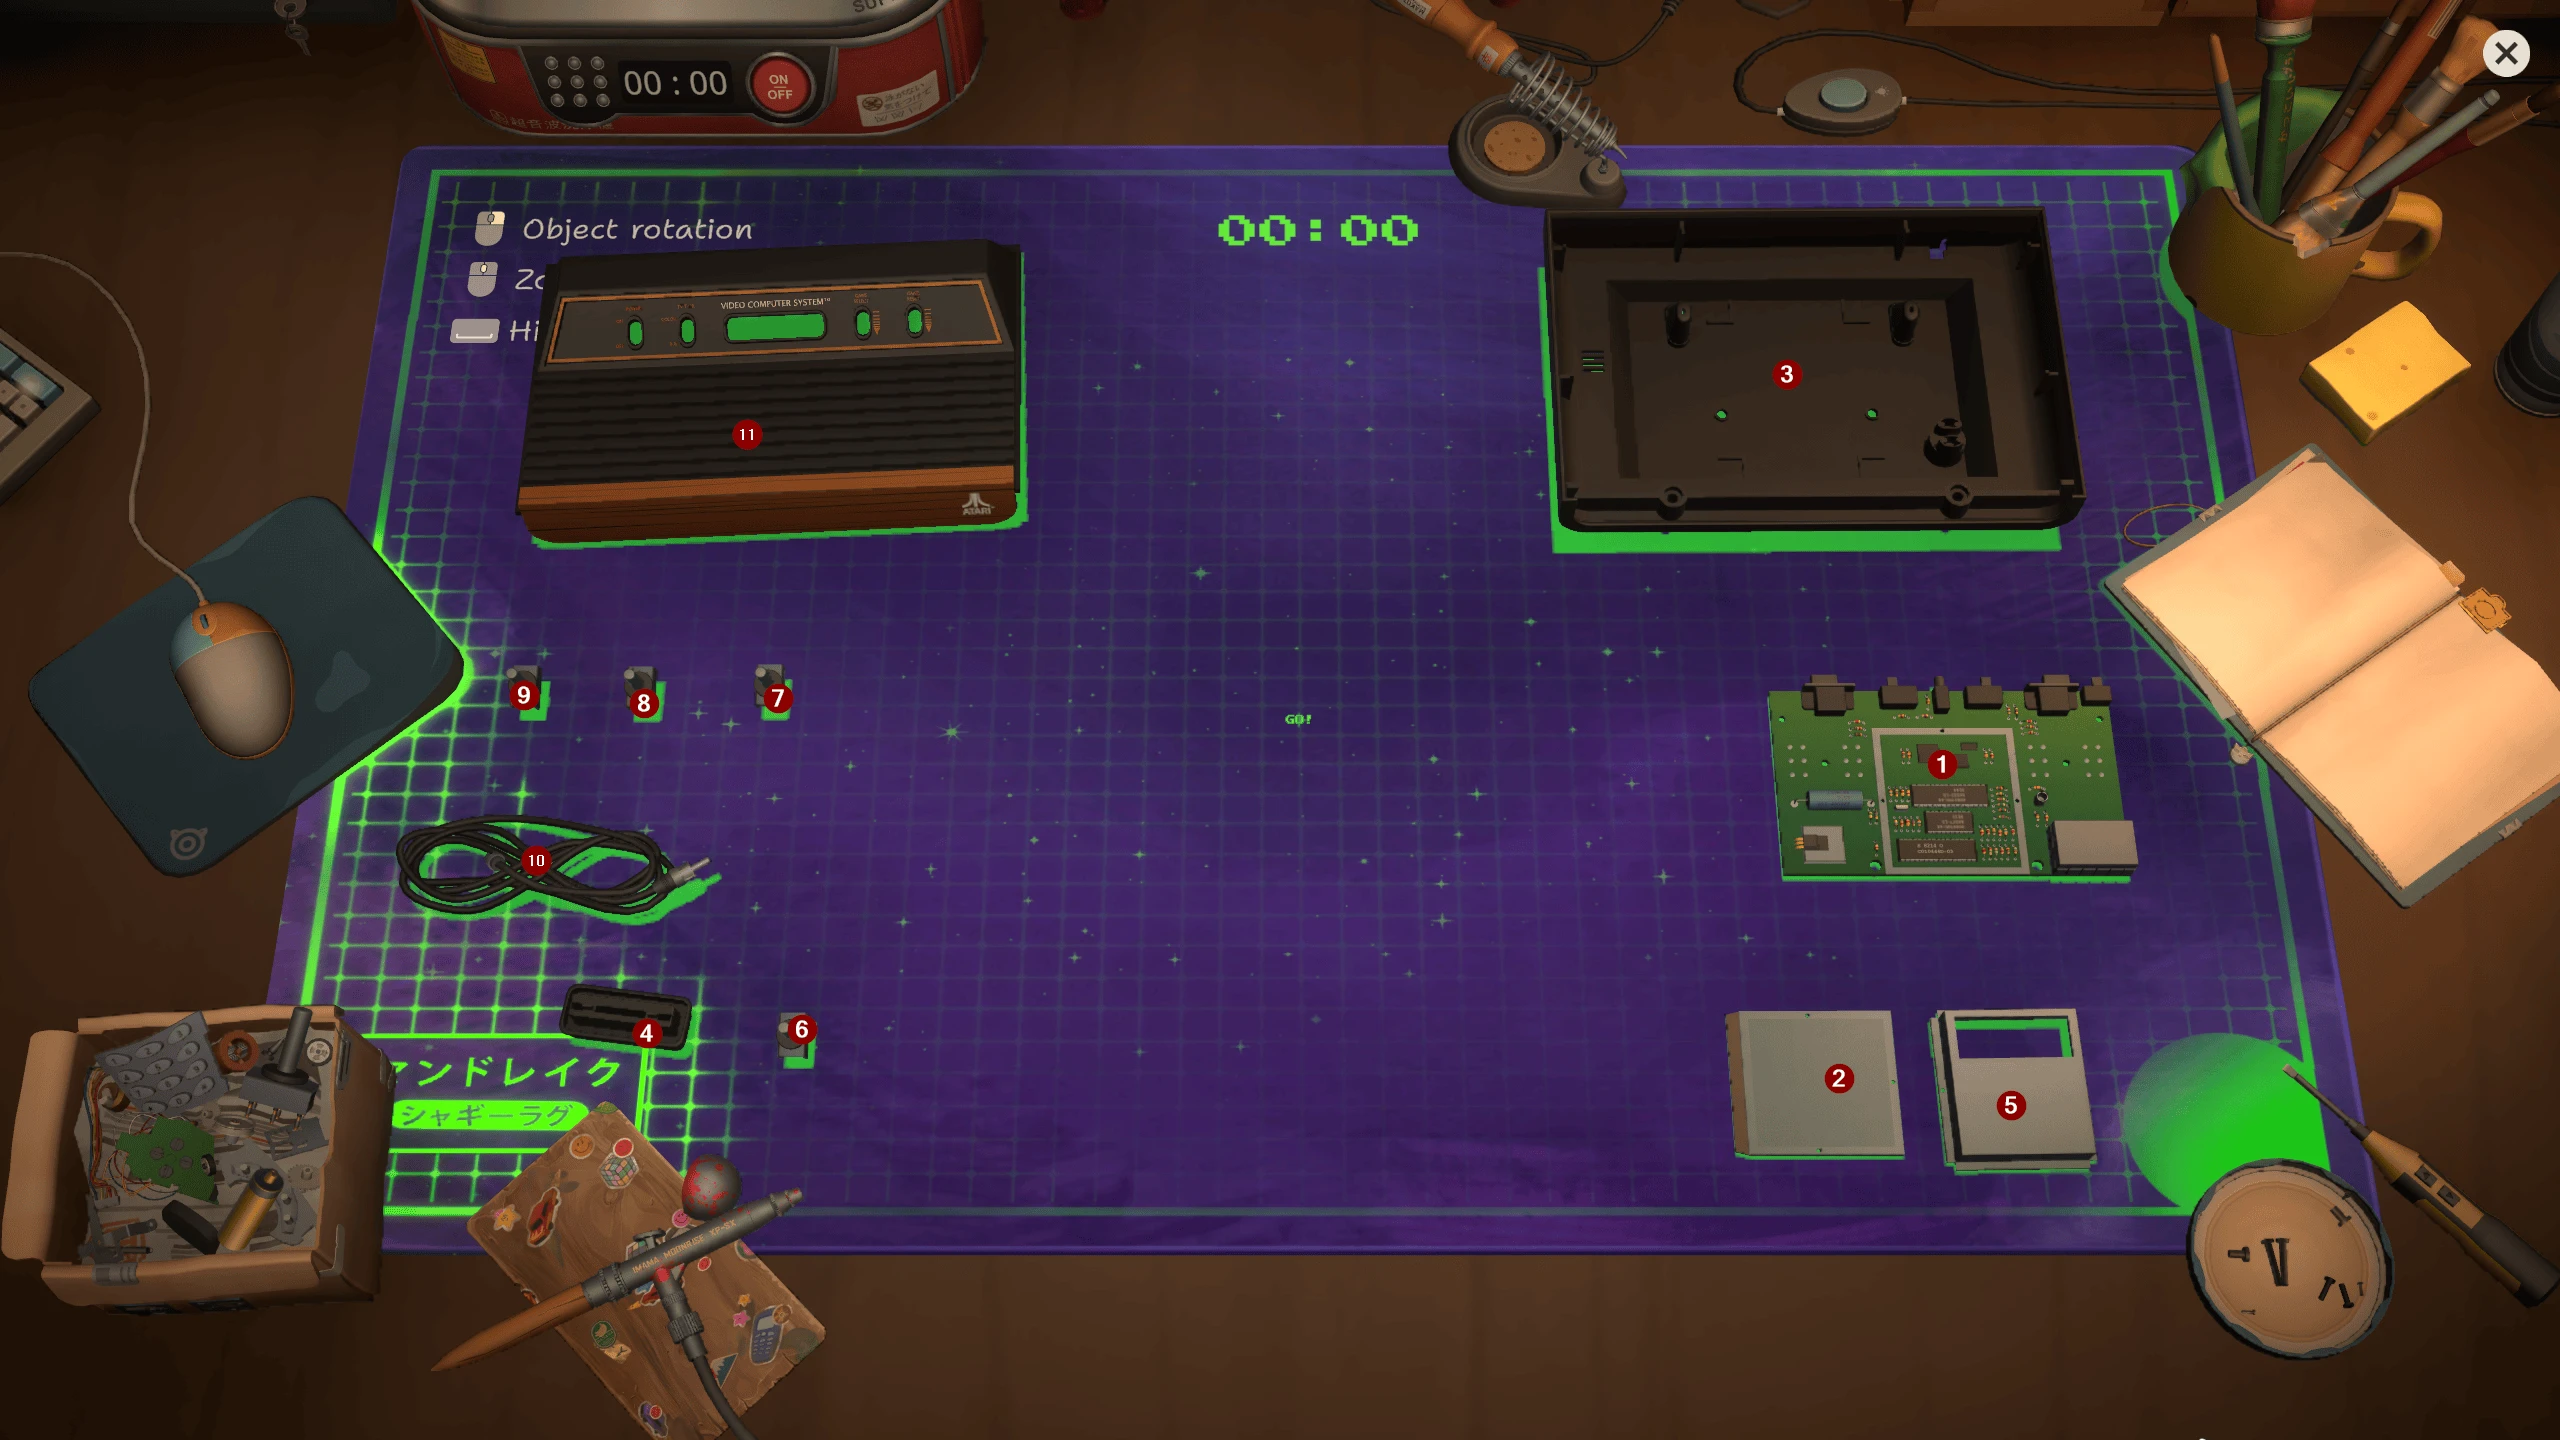
Atari 2600 casing halves, board, shielding, switches and cable. Competition layout; red numbers are the source author’s annotations.
Diagnose before buying a donor
A documented play example exposed a cracked top cover and broken switch; a cheap donor supplied usable switches but its own cover was cracked. That is the central marketplace risk. Write down the exact missing pieces first, read the seller's claim, inspect the price against the job reward, and assume an untested donor may fail in the same area as the customer unit.
Parts and profitability check
Compare direct parts with a donor rather than treating the cheapest device as automatic profit. If the order pays only slightly more than the donor, one additional broken cover or cable can erase the margin. Same-model donors become attractive when you need several pieces or when the remaining pieces can support later repairs. Keep bill and accepted-job cash separate from speculative Atari stock.
What ReStory simplifies
Community teardown footage notes that some real Atari connections would be soldered, while the game turns them into removable interactions. Follow the in-game assembly guide and task state, not a real field-service manual. Real hardware references are useful for recognizing the shell and component roles, but they cannot override the game's interaction model.
Atari 2600 repair checklist
Audit the device before closing the final shell.
- Record the payout and exact fault before shopping
- Remove the exterior case before internal shield fasteners
- Clean the case, RF shield, cartridge slot, and every exposed target
- Check switches and cable individually
- Match donor model and needed pieces
- Reassemble in reverse order and verify the remaining task indicator
Research links
These are the primary pages used to check the facts and current release context in this guide.
Official information, observable release behavior, and community reports are deliberately separated. A community report is not presented as a universal fix until it can be reproduced or supported by current patch notes.